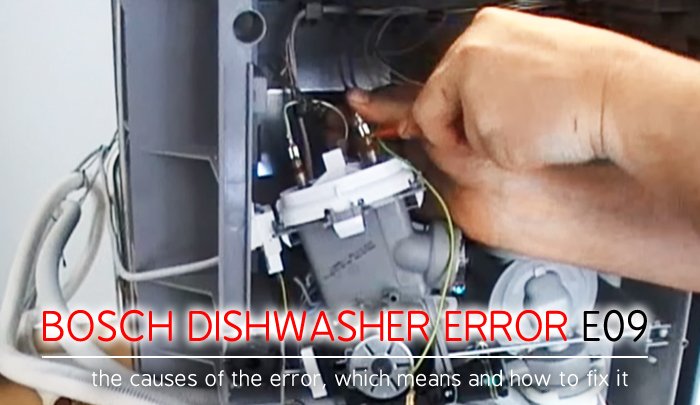
If your Bosch dishwasher shows an E09 error code, you have to eliminate the problem immediately because this breakdown is considered to be serious.
What is the reason for the appearance? What does it mean?
The E09 error of the dishwasher by a famous German brand Bosch informs about the breakage of the heating element. It has burnt. The dishwashers’ heater somewhat differs from the dishwashers one, since it is integrated with the circulation pump and cannot be replaced separately.
Important! The E09 error code is programmed only in the machines of the third generation. Therefore, it is important to know exactly the model of your device to buy a suitable replacement part.
In rare cases, this error may occur due to a failure of the temperature sensor or control card, as well as in the case of a fault in the wiring from the heating element to the module.
There are 3 reasons why the heater has burnt:
- There is water in the heater. It can get to the heater through the leakage points that have appeared. Most often, this place is a rubber band, which is placed between the dishwasher body and filter glass.
- The drainage filter is clogged. Because of blockages, water enters the tank slowly, and the heating element overheats. It leads to rapid wear.
- Hard water and scale. If there is not enough salt in the ion exchanger, the water becomes stiff. When it is heated, the scale is formed on the heating element. Over time, the bloom causes prolonged water heating and the heater breakage.
Replacement of the heater
To check and replace the heating element of the Bosch dishwasher is not difficult. For this, we need a crosshead screwdriver, a multimeter, and a new heating element. The main difficulty is that the heater is connected to the circulation unit and in order to remove the heating element, it is necessary to get away this unit. It means that it is necessary to disassemble the dishwasher almost completely. If this does not stop you, start working.
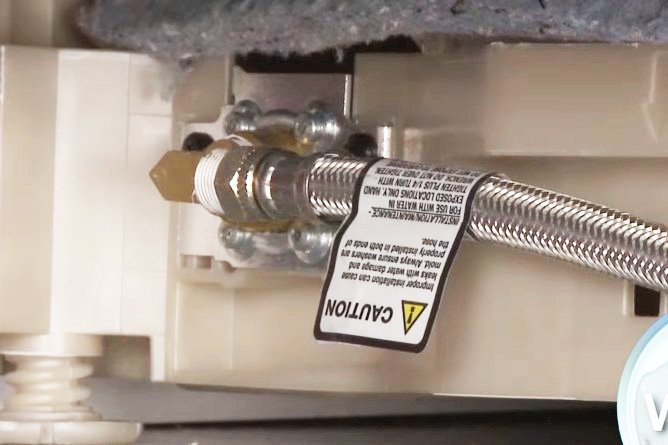
1. At this stage of the work, the Bosch dishwasher is connected to the sewerage, water supply and electricity, therefore, first of all, disconnect the device from the indicated units.
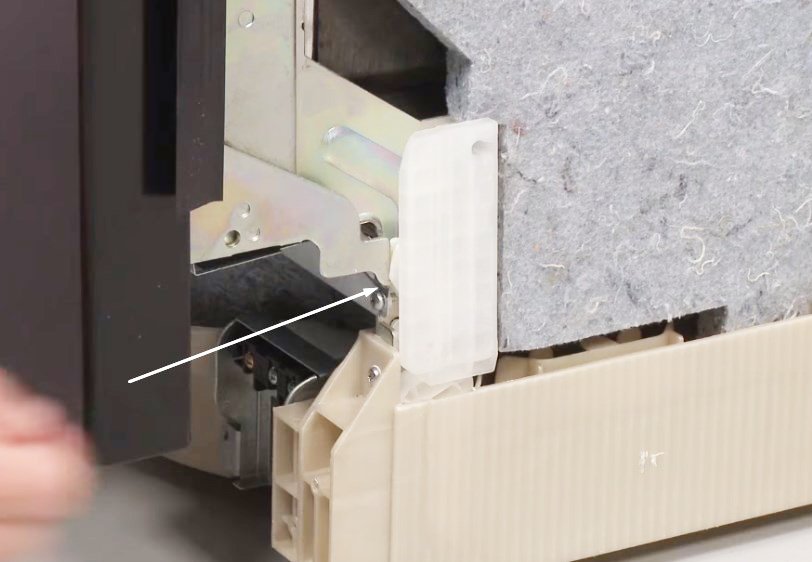
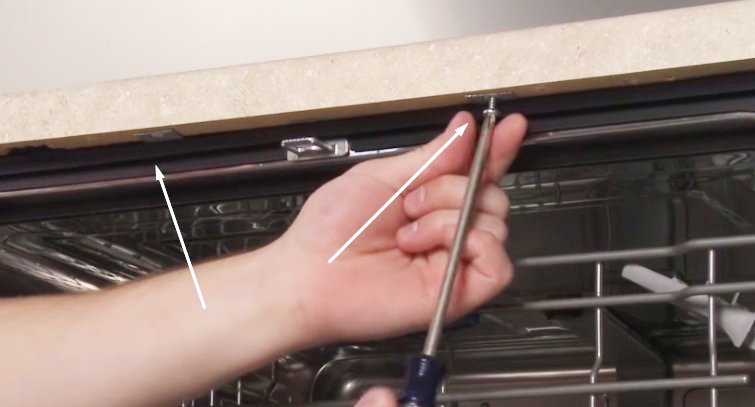
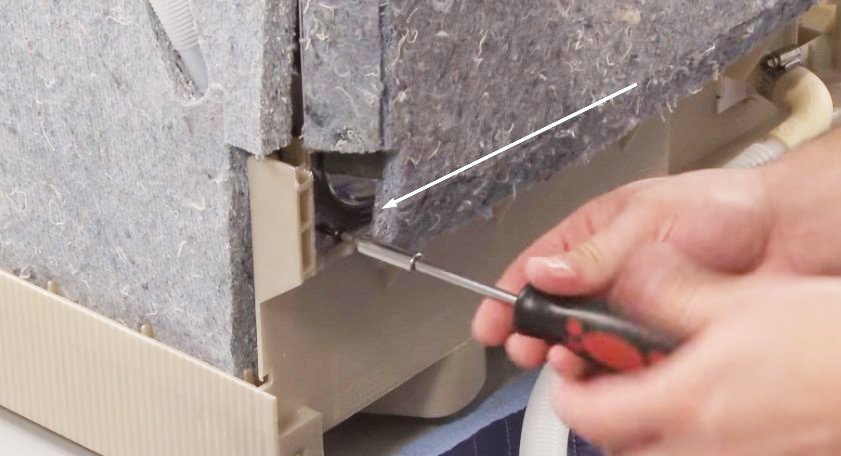
2. Next, remove the plastic clips located on the edges of the body and unscrew the front part of the machine.
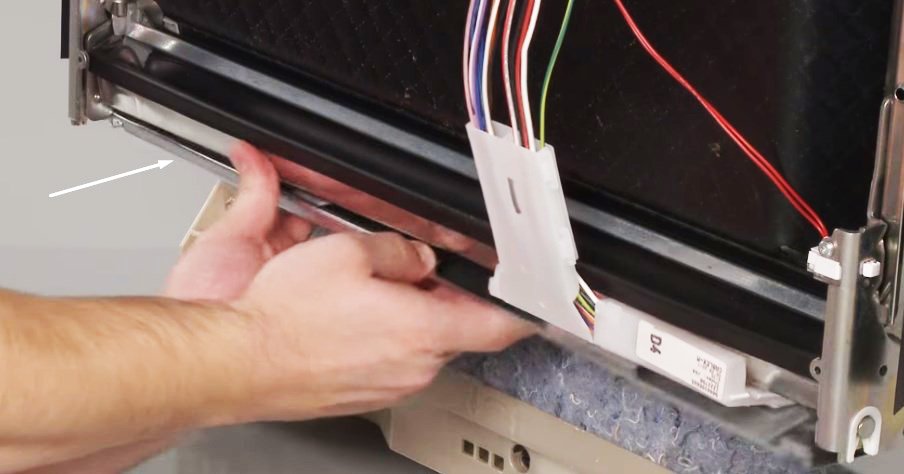
3. After that, unscrew the thin narrow metal panel, located below the dishwasher door.
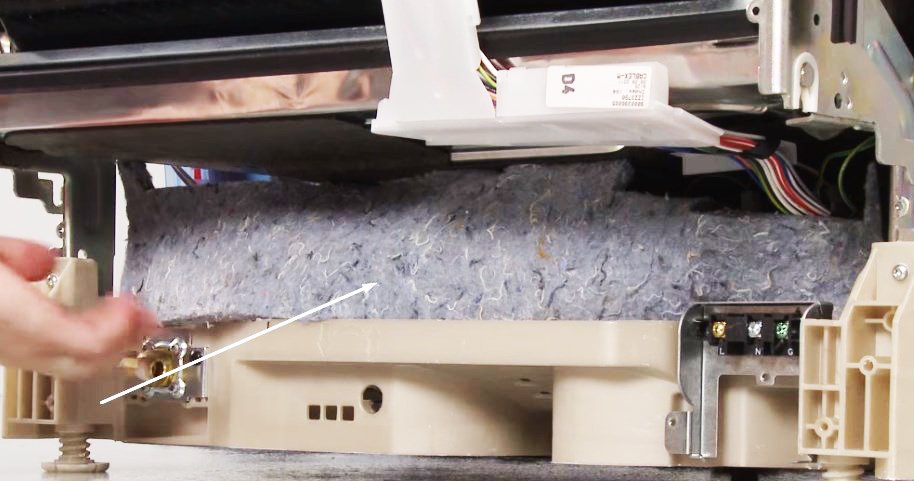
4. Remove a heat-insulating material and put it aside.
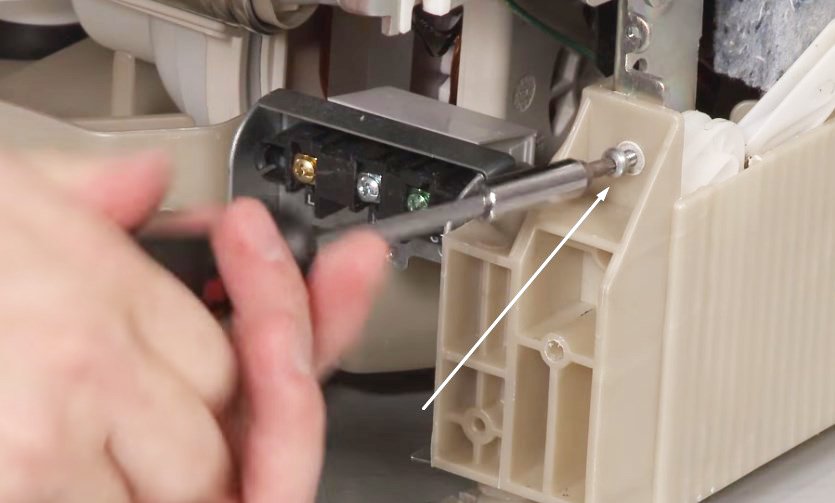
5. Loosen the screws that hold the pallet.
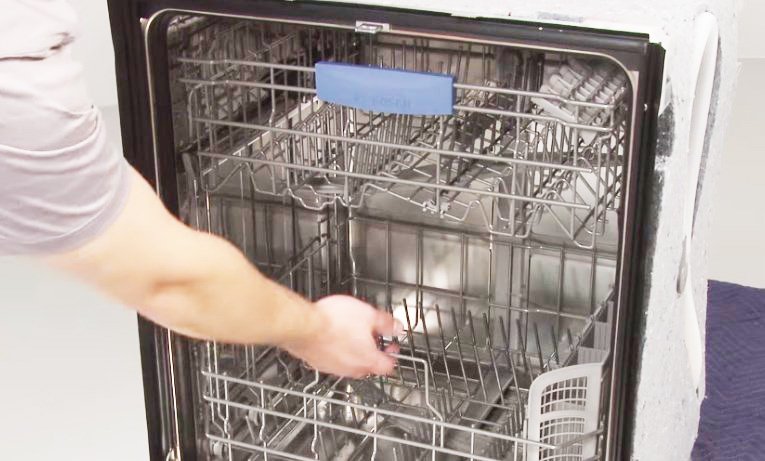
6. Open the dishwasher door and take out the baskets for dishes.
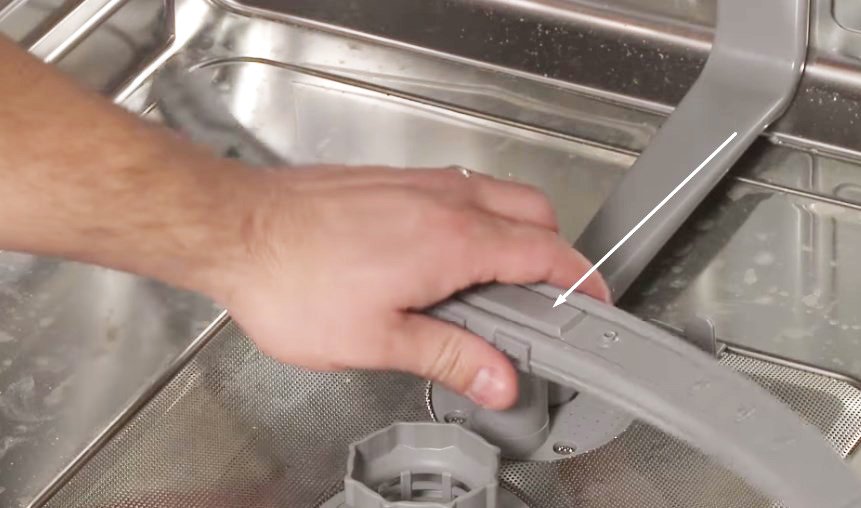


7. Remove the lower sprinkler and unscrew the garbage filter glass. In addition, remove the metal mesh, located on the bottom of the cleaning body.
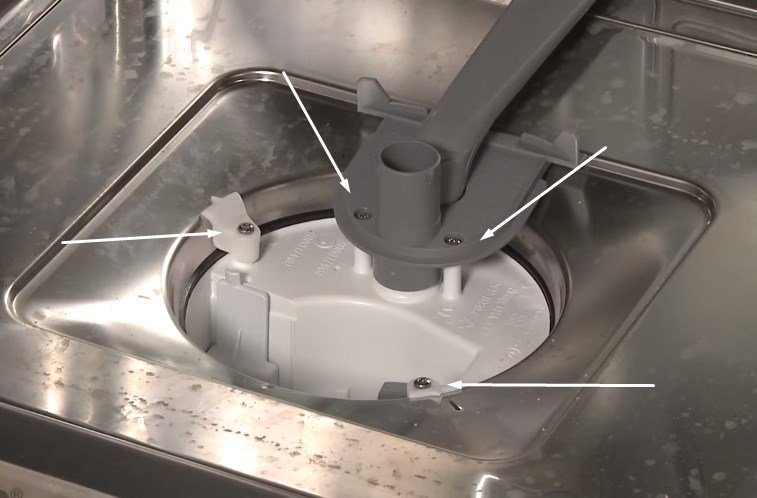
8. Unscrew the 4 screws that hold the circulation unit from the side of the body.
9. Put a well-absorbent cloth on the floor behind the dishwasher and put the “home assistant” on the back wall.
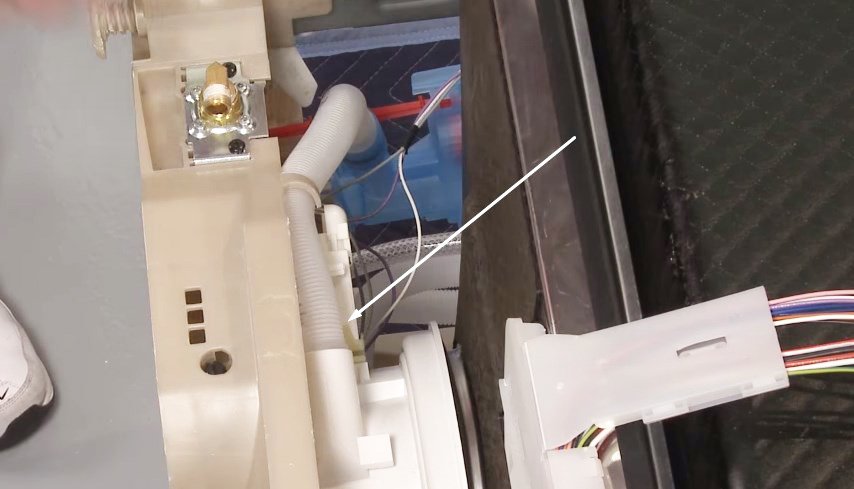
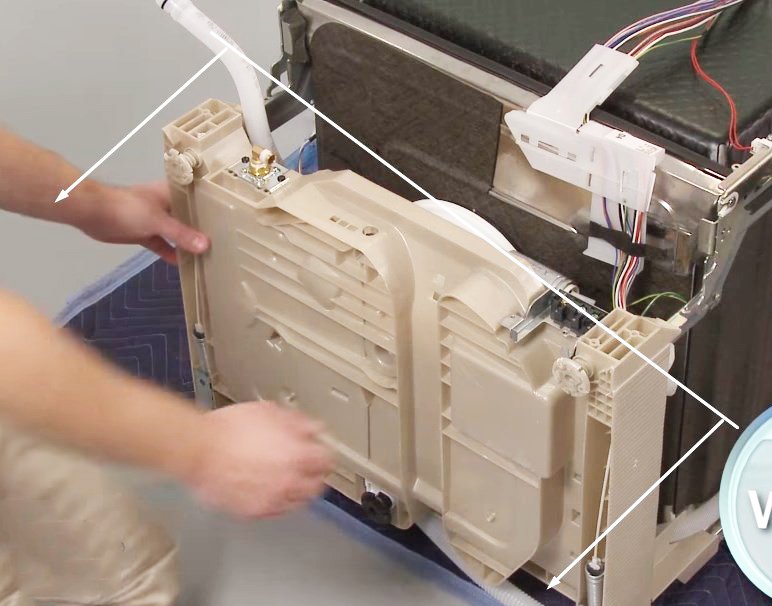
10. Disconnect the filling nozzle from the circulation unit and remove the pallet.
Don’t pull the pallet towards yourself very much, it is enough to pull it out slightly to allow more free access to the parts that are attached to it.
- Turn the drain pump clockwise, detach it and put it down.
- Remove the circulation unit from the fasteners that are hooked, so be careful.
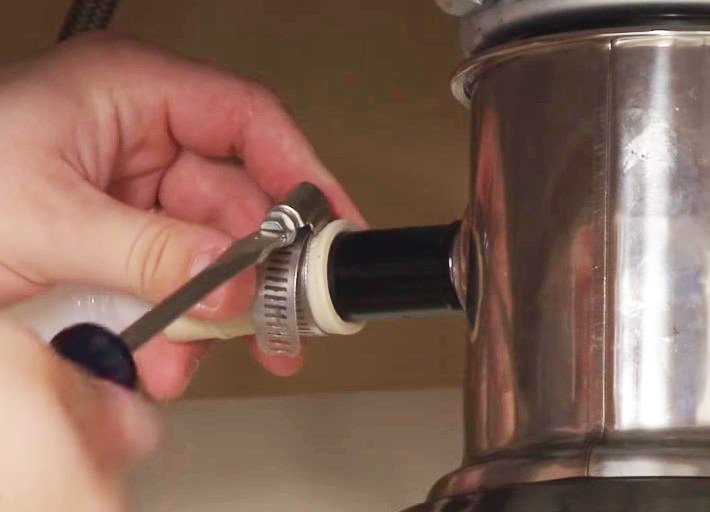
- Detach the drain hose and pull the unit out, unhooking the chips with wires.
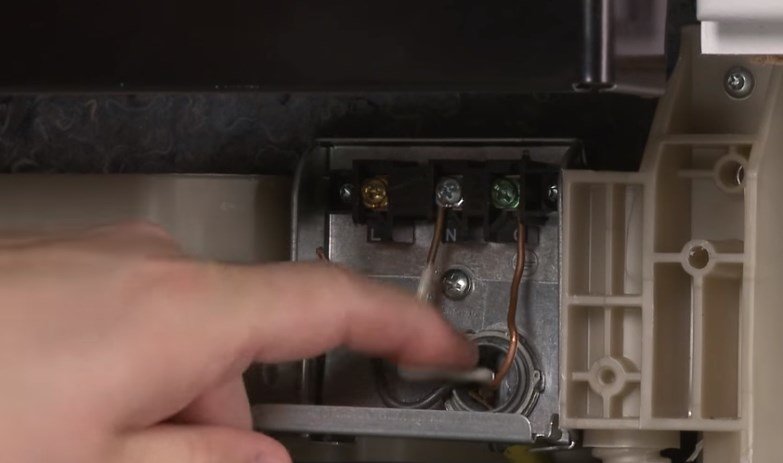
- Remove the clamp that secures the heating element to the circulation unit and disconnects it, removing the chips with the wires. Before removing the chips, take a picture of their location to not to be confused when assembling.
- Unpack the new heater and put it in place of the old one, having hooked all the chips to the contacts.
Perhaps the problem was not caused by the heating element. Therefore, to calm yourself, measure the resistance of the old part using a multimeter before putting a new one. At the final stage, assemble the dishwasher in the reverse order and check its operation. The repair is finished!